User Guide
Overview
This guide walks through and explains each area of ALZ Shop for the Cause. The navigation pane on the right will allow quick movement to specific sections of this guide.
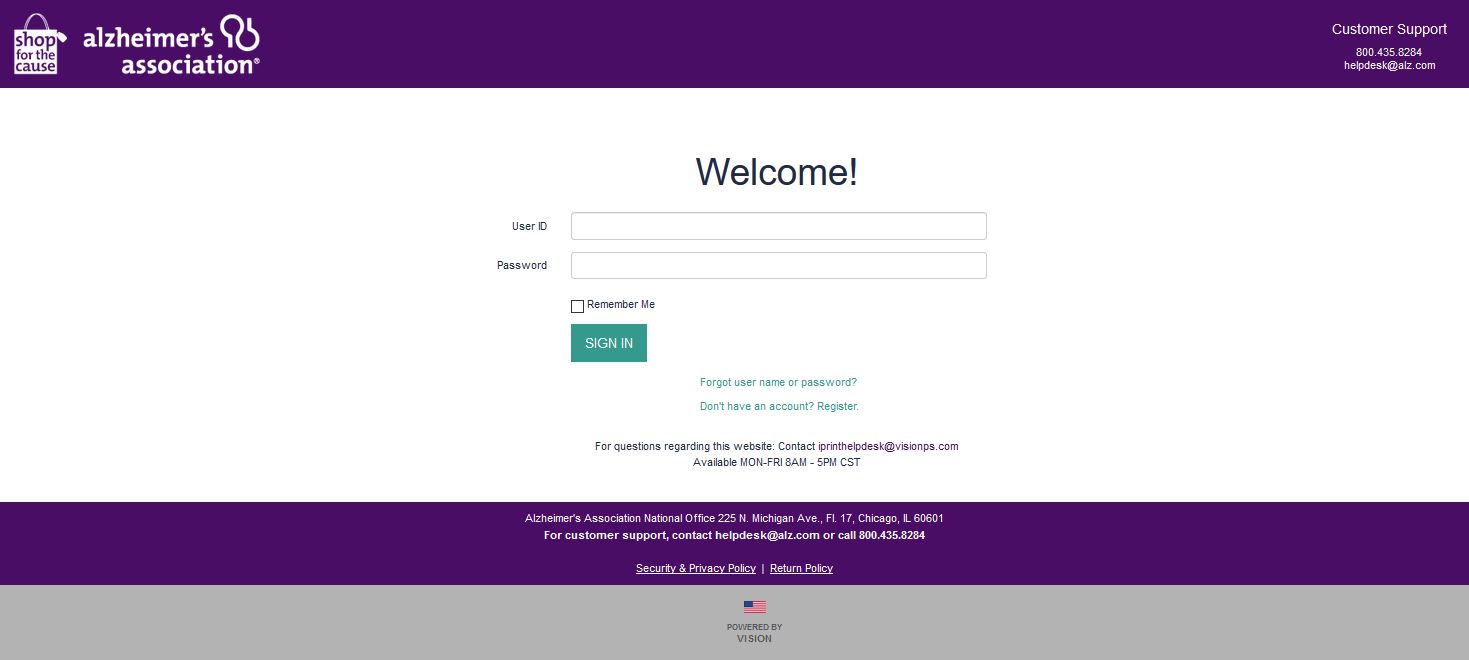
Logging In
The shop site includes an optional self-registration and log-in located in the upper right-hand corner of the screen. This option will allow you to store an address book for easy check-out, quickly review your past orders, and save items to a Wishlist for future purchase. If you have previously registered but have forgotten your password, click the “forgot password” link and you will be sent an e-mail to re-set your user. If you have not registered, click the "don't have an account" link to be directed to the registration page.
For customer support, email alzsupport@visionps.com or call us at 866-662-2948.
Home Page
The navigation bar across the top of the home page provides one-click access to the home page through the Shop for the Cause logo, a simple item search, access to the user profile, user support, and the user’s cart. The header also includes one-click donation access! The lower section of the home-page provides clickable links to each of the categories in the Alzheimer’s catalog.
The body of the homepage is stocked with quick access links to relevant communications, including featured products, campaigns, and our newsletter.

Shop & Explore
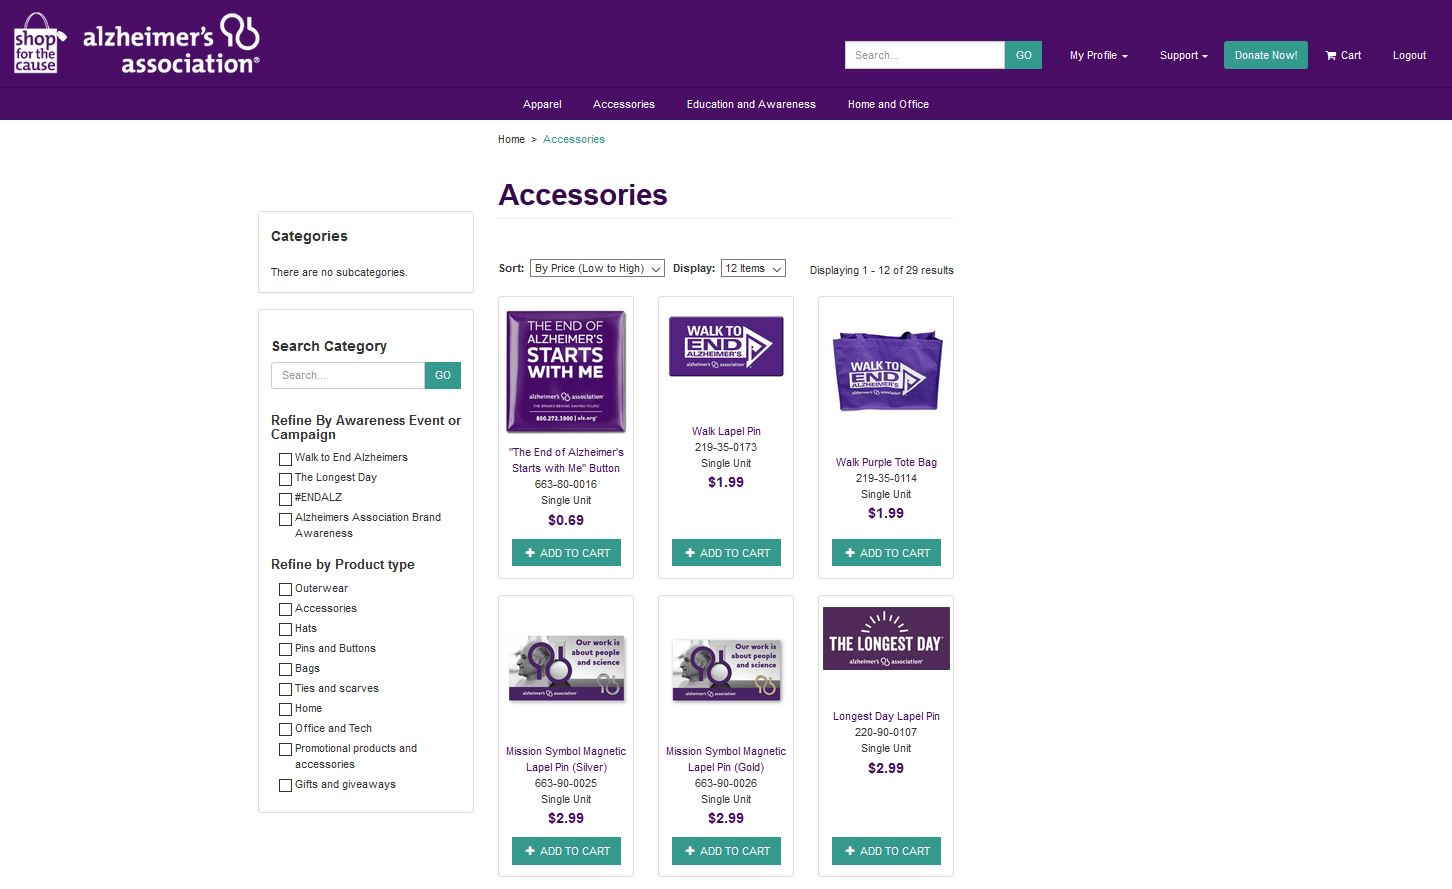
Locating Details
Products can be sorted according to user preference using the drop-down located under the catalog title. The left-hand navigation menu allows for both quick searching within the category, as well as robust filtering that can be used to drill-down by campaign or product type.
The user can access item details by clicking on an individual item, or add items directly to the cart. Quantities can be updated directly in the cart.
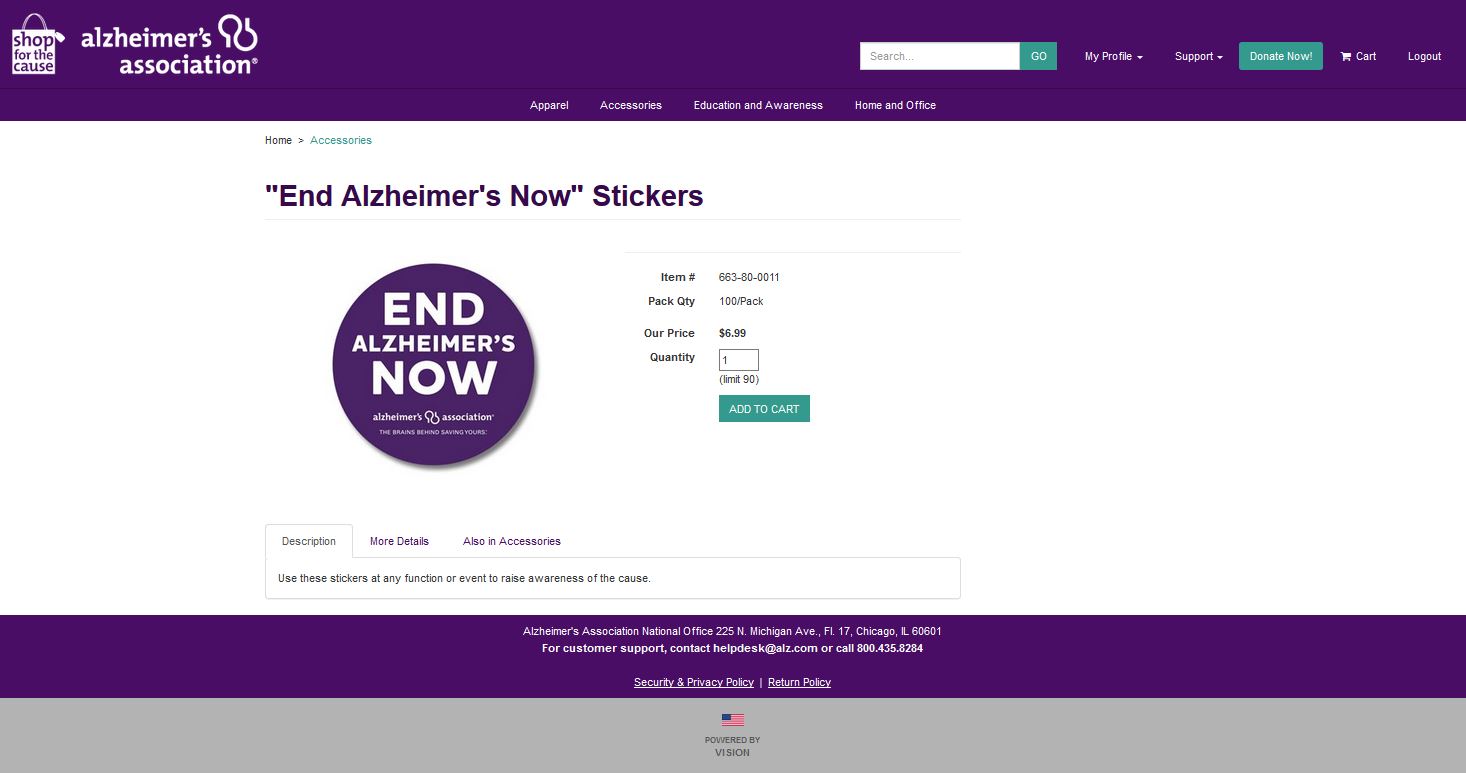
Product Details
Clicking on an item's image or name provides detailed information about the product, and allows the user to select a specific quantity and add the item to their cart. The breadcrumb links at the top of the page allow for easy navigation back through the category structure, and the “Wishlist” button allows an item to be added to the Wishlist section of the user’s profile for easy access at a later date or time.
If you have chosen a customizable item, the details section will include drop-downs and free-form fields which allow the user to customize the piece.
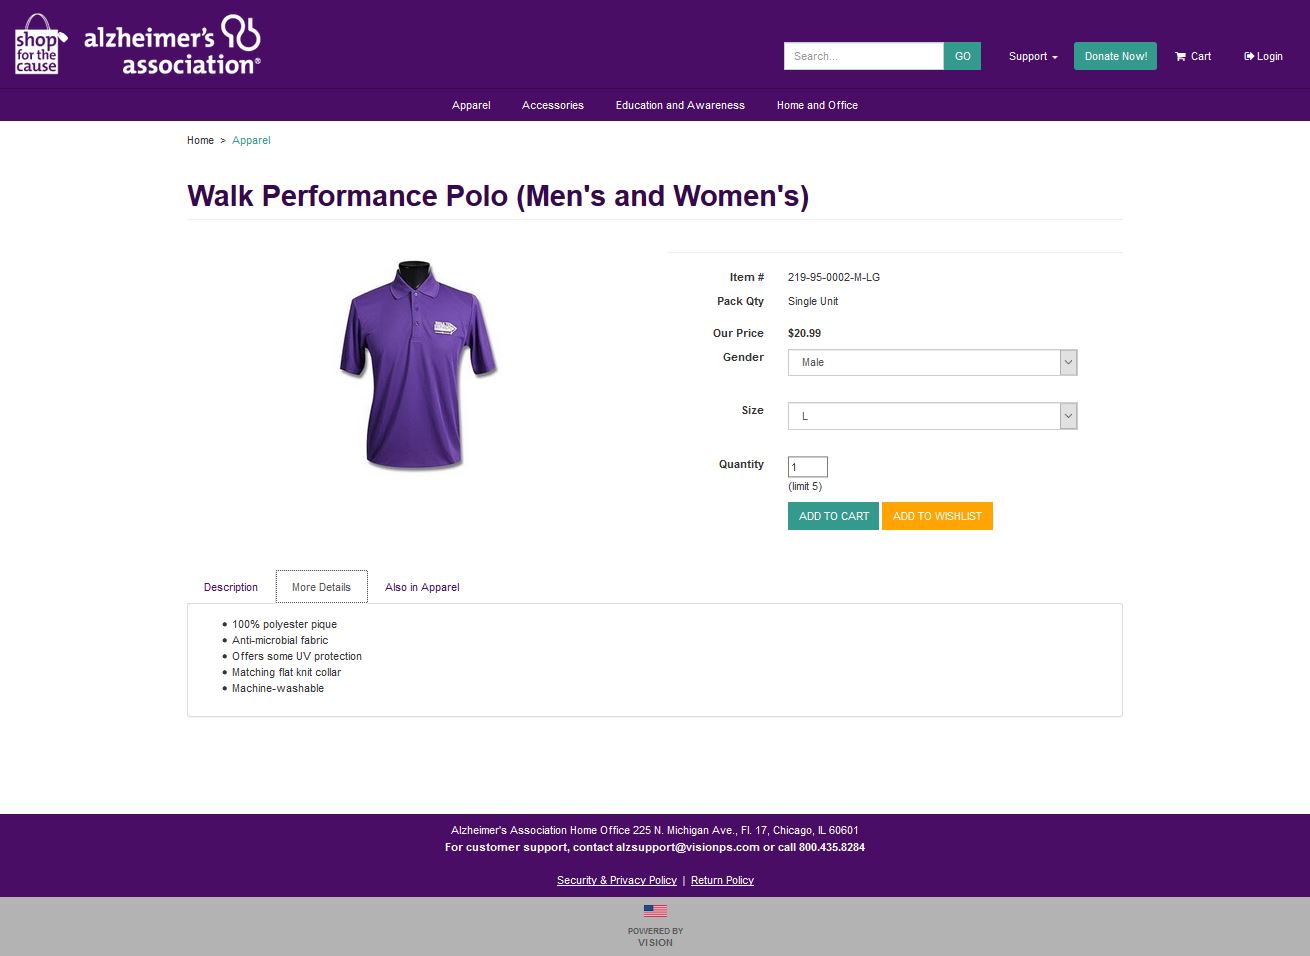
Some items are sold in packs instead of by unit. When this is the case, it will be labeled clearly below the item number. When ordering these items, the user should manually enter the quantity of packs desired into the free-form field provided.
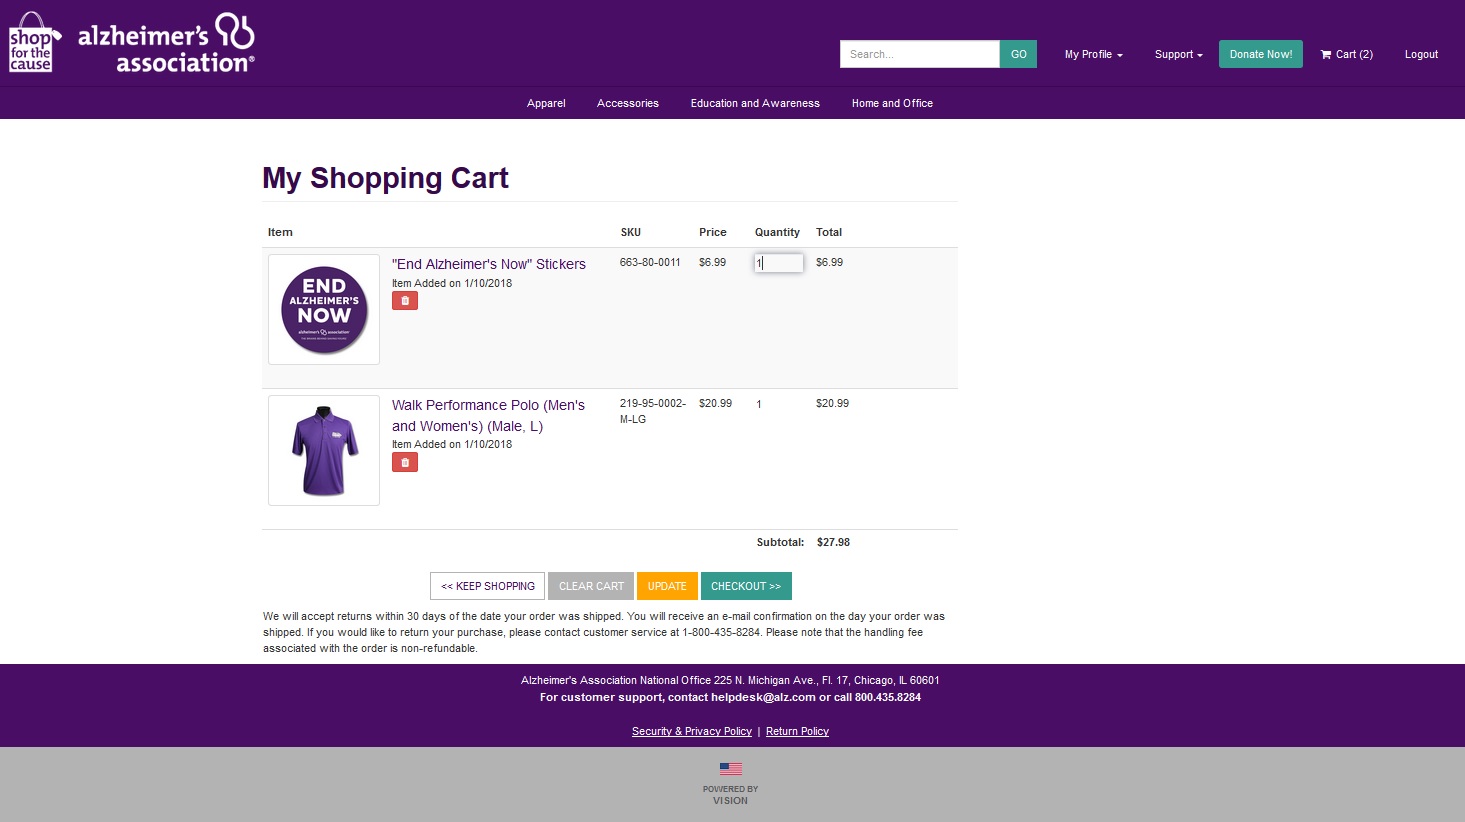
Shopping Cart
As the user shops, the shopping cart will be automatically updated, allowing for a streamlined view and easy access to check-out. A mini-shopping cart will appear on the left side of the screen while in category view, and a larger shopping cart can be accessed anytime using the button on the upper right corner of the site. Both carts can be used to update quantities, remove items, and proceed to checkout.
Checkout
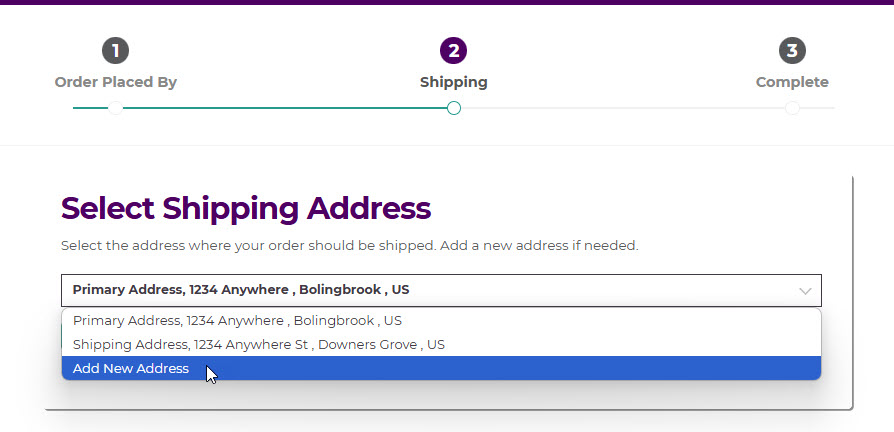
Clicking the checkout button in the cart will launch the checkout process. If the user is logged in, the checkout screen will default the user’s billing address from their profile. Otherwise, the user will need to enter a shipping address before proceeding to the complete check-out screen. Should they desire to ship to a different address than originally entered, simply click the dropdown and select “Add New Address”.
Once address details are confirmed, the user will be able to select the appropriate ship method, verify their order, enter their credit card information, and complete their order. Should the user’s credit card get declined for any reason, a red message will appear. If this occurs, please validate your billing address and call the credit card issuing company for further instructions.
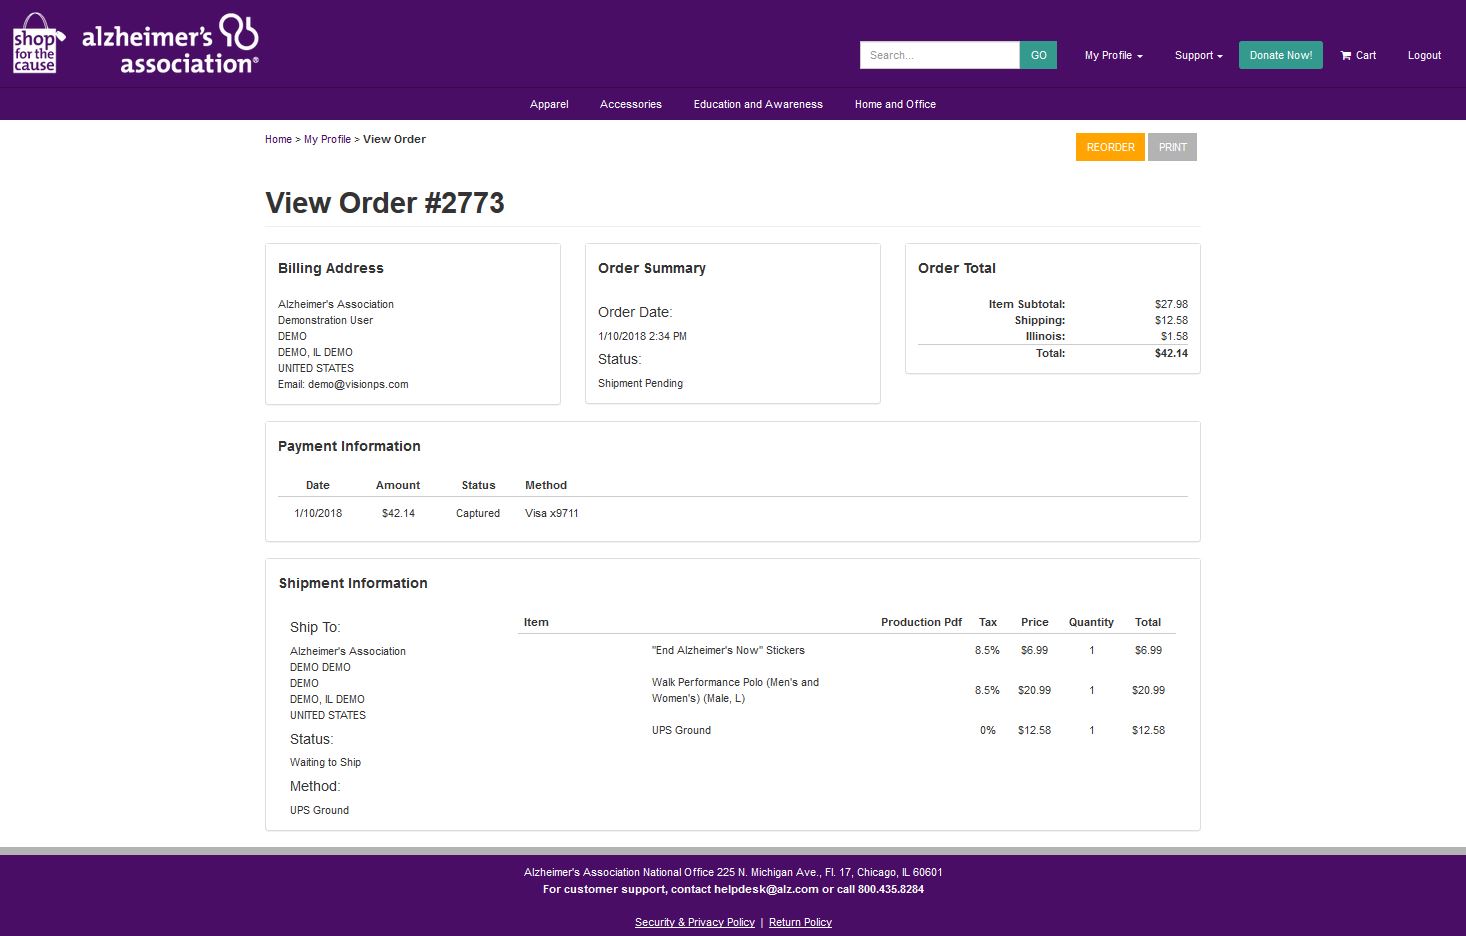
Order Confirmation
After the order has been placed, the ordering user will be sent a confirmation e-mail and a confirmation screen will appear. This screen provides a full synopsis of the order details as well as a reorder button in the top right, which allows a duplicate order to be immediately placed. The navigation bar at the top of the screen can be used to navigate back though the site.
My Profile
The My Profile page is designed to provide users a place to store and review information that is specific to their userID.
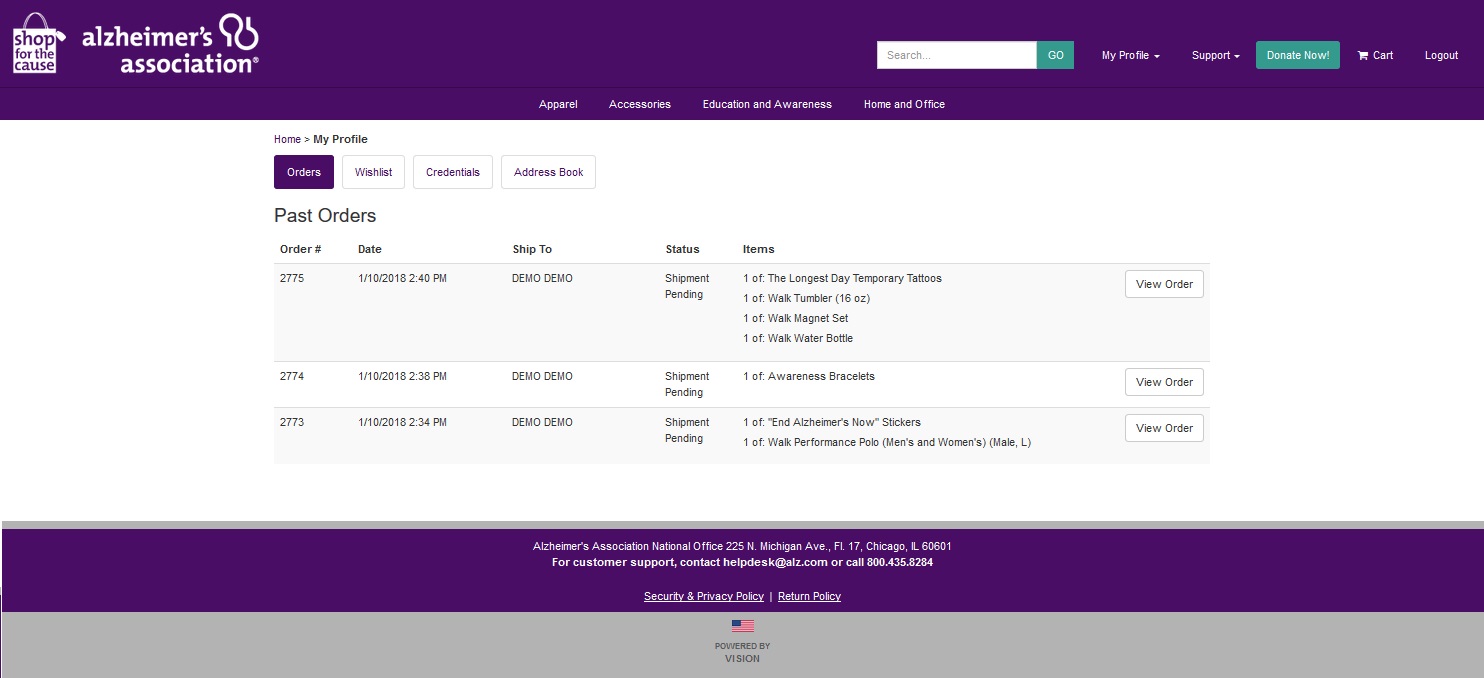
My Orders
The My Orders tab of the profile provides a quick view into the user’s most recent orders including status and tracking information wherever applicable. Each order is equipped with a “view order” button that will direct the user to the view order page where they can view the details of the order and/or use the reorder button to duplicate the order.
Wishlist
The Wishlist Items tab contains all items the user has previously selected as “Wishlist” and provides them a way to order them with their previous specifications with one click on “add to cart”. To add a new Wishlist item, visit the item in the catalog, select the relevant details, and click the Wishlist button.

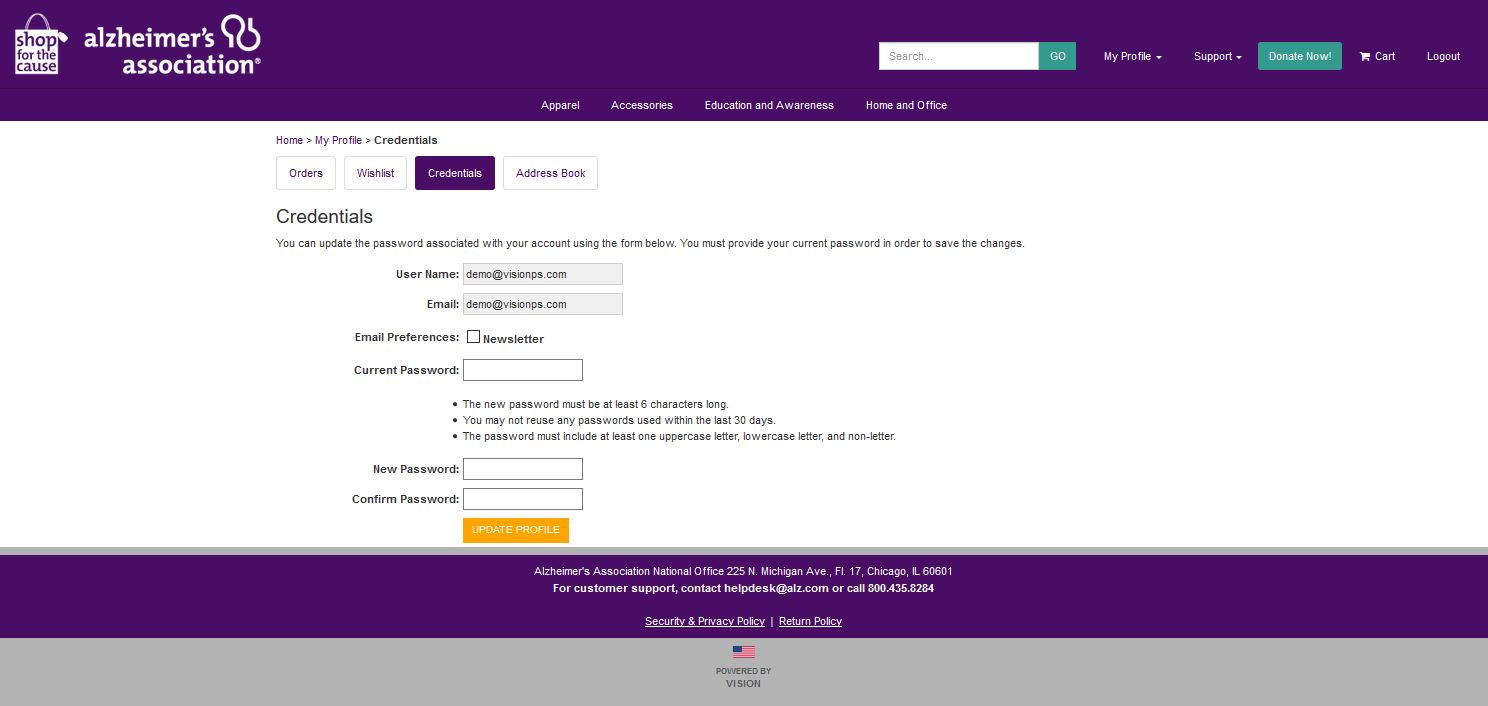
Credentials
As the user shops, the shopping cart will be automatically updated, allowing for a streamlined view and easy access to check-out. A mini-shopping cart will appear on the left side of the screen while in category view, and a larger shopping cart can be accessed anytime using the button on the upper right corner of the site. Both carts can be used to update quantities, remove items, and proceed to checkout.
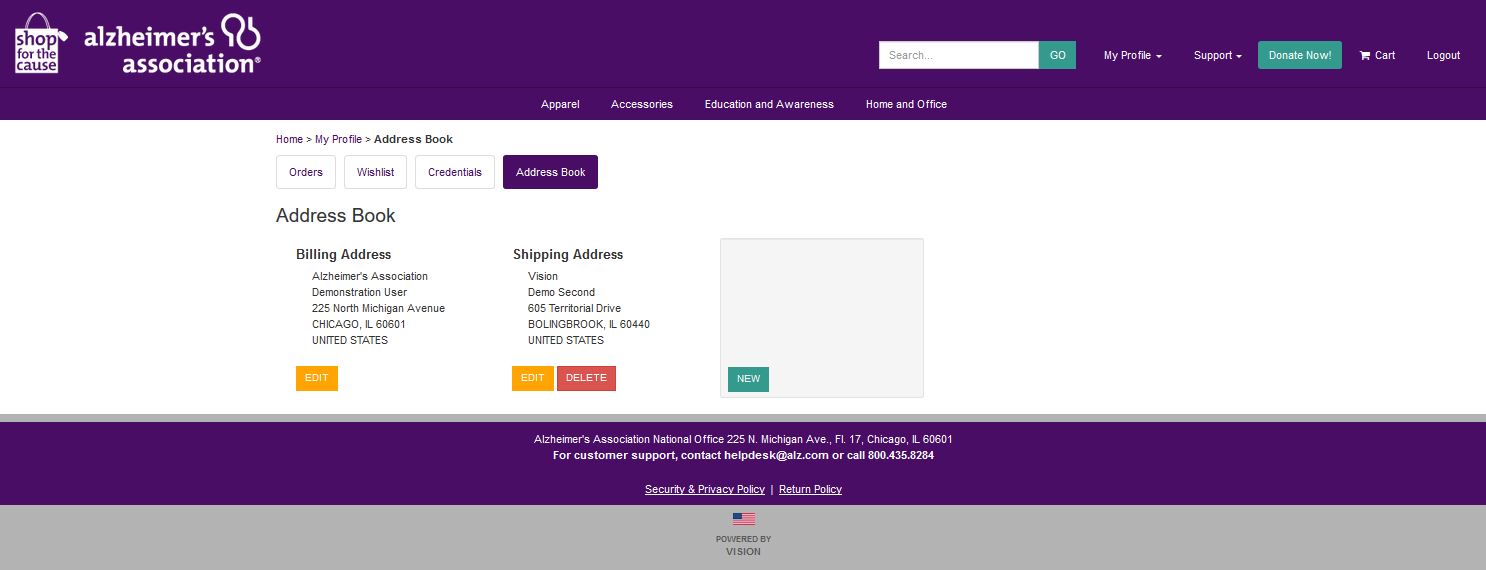
Address Book
The Address Book saves the user’s billing address and frequent shipping addresses, so they can easily be populated on the Checkout page. To save a new address, click “new” and enter the relevant details. To update a currently saved address, click “edit”, or click “delete” to remove one. The “new” button allows the user to add additional addresses to select from on check-out.